IDE Integration
Writing scripts in IntelliJ IDEA is pretty straightforward if you’re already familiar that IDE. Most editor features should work after a little setup, which will be described in this section.
Prerequisites
- Instance of IntelliJ IDEA editor installed on your PC.
- Basic knowledge of Kotlin language and Gradle build system.
Repository
Easiest way to get started is to clone EchoNineLabs/KiteScripting repository.
git clone https://github.com/EchoNineLabs/KiteScripting.gitOnce cloned, open it as a project in IntelliJ IDEA and load included Gradle configuration.
Configuration
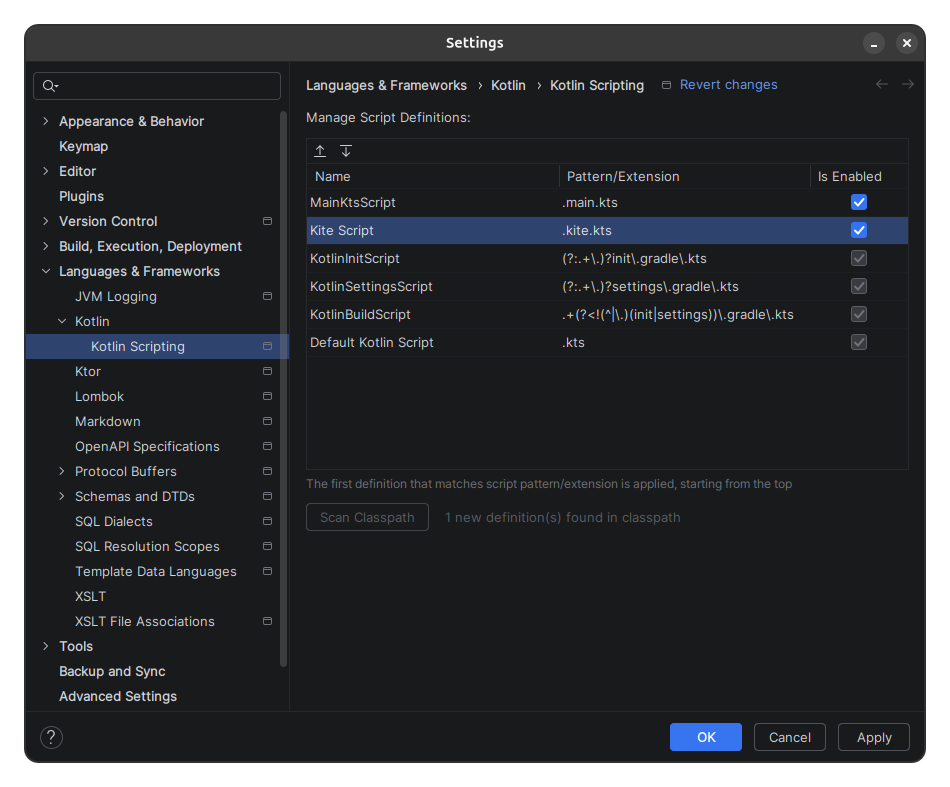
There is one thing you need to enable before you can start writing scripts, and that is, adding .kite.kts as recognizable script definition.
- Go to Settings ➜ Languages & Frameworks ➜ Kotlin ➜ Kotlin Scripting and click Scan Classpath button at the bottom.
- Once 1 new definition(s) found in classpath text appears, click Apply then OK.
- Re-open the same settings page and make sure Kite Script definition (
.kite.kts) is listed and enabled.
Dependencies
Since the project itself is a Gradle project, all dependencies are managed via build.gradle.kts file.
For example, if you would like to use a more recent version of Paper, configure build script like this:
dependencies {
    // Excluding Paper API that Kite is depending on. (1.21.1)
    api("dev.echonine.kite:kite:1.2.4") {
        exclude(module = "paper-api")
    }
    // Declaring more up-to-date version of Paper API.
    api("io.papermc.paper:paper-api:1.21.11-R0.1-SNAPSHOT")
}
Using custom Dependencies in your scripts?
Don’t forget to also add them to your build script. Otherwise, they won’t appear in code completions.
@file:Repository("https://repo.extendedclip.com/releases/")
@file:Dependency("me.clip:placeholderapi:2.11.7")repositories {
...
maven { url = uri("https://repo.extendedclip.com/releases/") }
}
dependencies {
...
api("me.clip:placeholderapi:2.11.7")
}More information about dependencies can be found here:
Writing Scripts
Scripts can be put pretty much anywhere, but it is recommended to keep them in src directory.
You can also organize them within subdirectories like explained in Getting Started guide but keep in mind additional files imported via @file:Import will not appear in completions due to editor bug / limitation.